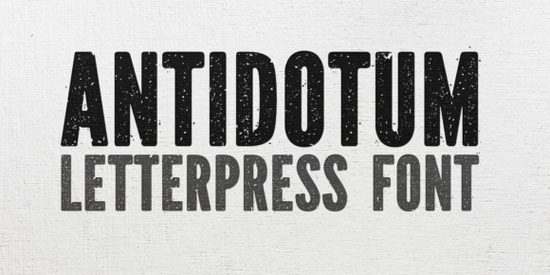
Finding the right texture for a vintage or rugged design can be tricky. Clean sans-serifs often lack the personality needed for rustic branding or edgy apparel. If you need something with a real tactile feel, the Antidotum Font offers a hand-made letterpress aesthetic that brings instant grit to your canvas. It is a highly textured display typeface built for projects that need to stand out with a raw, authentic edge.
What makes a letterpress style font work for modern projects?
Letterpress printing traditionally leaves a slight indentation and ink spread on paper, creating a distinct visual weight. Digital typefaces that mimic this process rely on rough edges and uneven ink distribution to simulate that physical press. This specific typeface captures that effect beautifully, giving your text a stamped, handcrafted look without requiring physical printing equipment.
One of the most practical features here is the inclusion of two distinct sets of capital letters. This allows you to mix and match glyphs, preventing the repetitive look that often happens when typing out long headlines. When you are exploring different textured display options for a poster or logo, having these alternate caps gives you much more control over the final composition and helps the letters flow together naturally.
How can crafters and POD sellers use grunge typography?
Print-on-demand sellers and small business owners frequently rely on bold, distressed text to create eye-catching merchandise. Grunge typography works exceptionally well on dark fabrics, rustic wood signs, and vintage-style paper goods. The uneven edges of the letters help the design blend naturally into the texture of a cotton t-shirt or a canvas tote bag, making the print look like it has been worn and loved for years.
Here are a few practical ways to apply this rugged style to your products:
- Apparel graphics: Use it for short, punchy quotes on the front of hoodies or tees.
- Product packaging: Apply it to kraft paper labels for artisanal coffee, handmade soap, or craft beer.
- Event branding: Create rustic wedding invitations or indie music festival posters that need a raw, authentic feel.
If you find that your current library lacks this specific rough aesthetic, you might also want to look at other hand-drawn typography bundles to expand your creative toolkit for future merchandise drops.
Which design software and pairings work best with distressed text?
Most standard vector and raster programs, like Adobe Illustrator, Photoshop, and Affinity Designer, handle these types of display faces perfectly. Because the edges are already detailed and rough, you do not need to add extra noise or distress filters in your software. Keeping the text as live copy or converting it to outlines will preserve the crisp, jagged edges when you export your files for printing.
To understand the physical printing techniques that inspired the Antidotum Font, it helps to look at traditional ink spreading on cotton paper. Pairing a heavy, textured face with the right secondary typeface is crucial for readability. Since the main headline carries a lot of visual weight, your supporting text should be clean and simple. A basic geometric sans-serif or a highly legible monoline script works well to balance the layout. For instance, if you want a slightly softer contrast for your subheadings, browsing through cleaner alternative typefaces can help you find the perfect supporting cast for your layout.
How do you prepare rough typefaces for physical printing?
When sending a distressed design to a commercial printer or a screen printing shop, file preparation is just as important as the design itself. The tiny specks and rough edges that make the text look great on screen can sometimes cause issues if the resolution is too low or the color mode is incorrect.
Always design your merchandise and print materials in CMYK color mode if you are using standard offset or digital printing. For screen printing, you will need to separate the colors and ensure the tiny ink drops within the letters are large enough to hold up on the mesh screen. If the distressed details are too fine, the printer might ask you to simplify the artwork.
It is also highly recommended to outline your text before sending the final file. This converts the letters into vector shapes, ensuring the printer does not need to have the specific typeface installed on their machines. Outlining preserves every single jagged edge and ink blotch exactly as you designed it.
Quick checklist for setting up your next vintage text project
Before you finalize your design and send it to production, run through this quick setup list:
- Check your canvas resolution to ensure it is set to at least 300 DPI for physical printing.
- Verify that your color profile is set to CMYK for standard print shops, or use specific Pantone codes for screen printing.
- Test the alternate capital letters to see if mixing them improves the visual rhythm of your headline.
- Pair your main grunge text with a simple, clean secondary typeface to maintain high readability.
- Convert all text layers to outlines or shapes to lock in the distressed edges and prevent font substitution errors.
 Nectarine Font: a Fresh Design for Modern Projects
 The Troemys Trio: Your Complete Typography Toolkit
 Creative Typography: London's History Through Duo Fonts
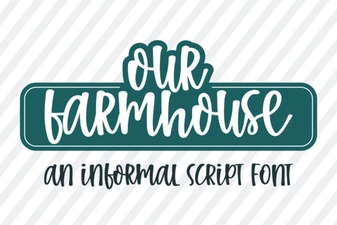 Our Farmhouse Font for Creative Projects
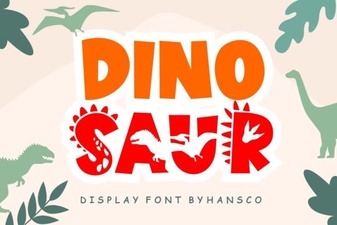 Creative Font Designs for Dinosaur Illustration Projects
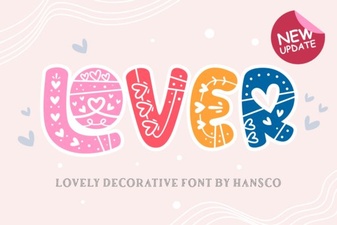 Fonts for Love Letters & Creative Design Projects